

Making the 'Dürer's Solid' Terrarium
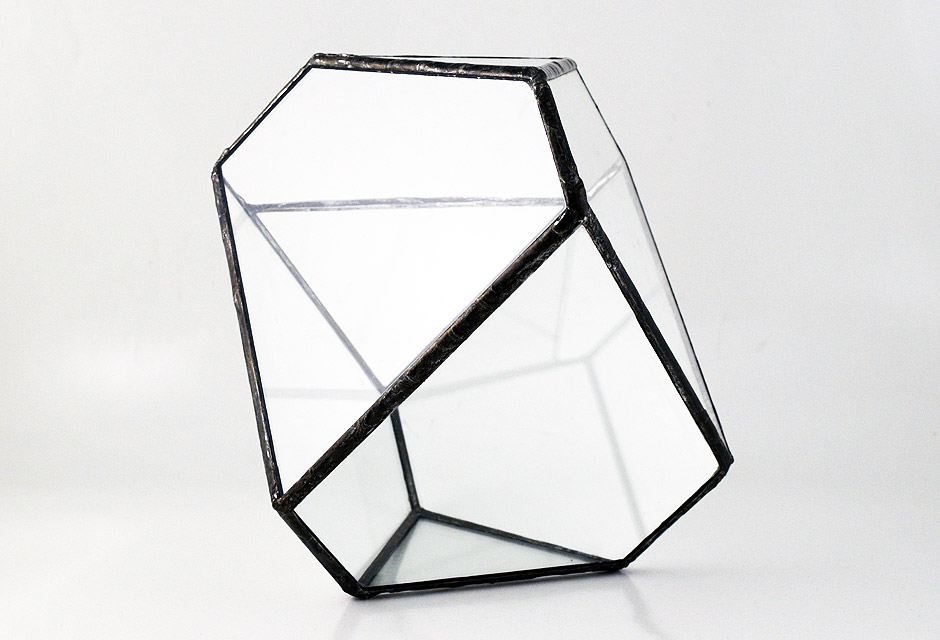
In 1514, renaissance artist Albrecht Durer produced the enigmatic engraving known as 'Melencolia I'. Among the many symbolic items represented in this work is a large geometric stone object, referred to as 'Durer's solid'. There's something about the proportions of this polyhedron that draw the eye in, but it's difficult to say exactly why. The object itself resists definitive definition.

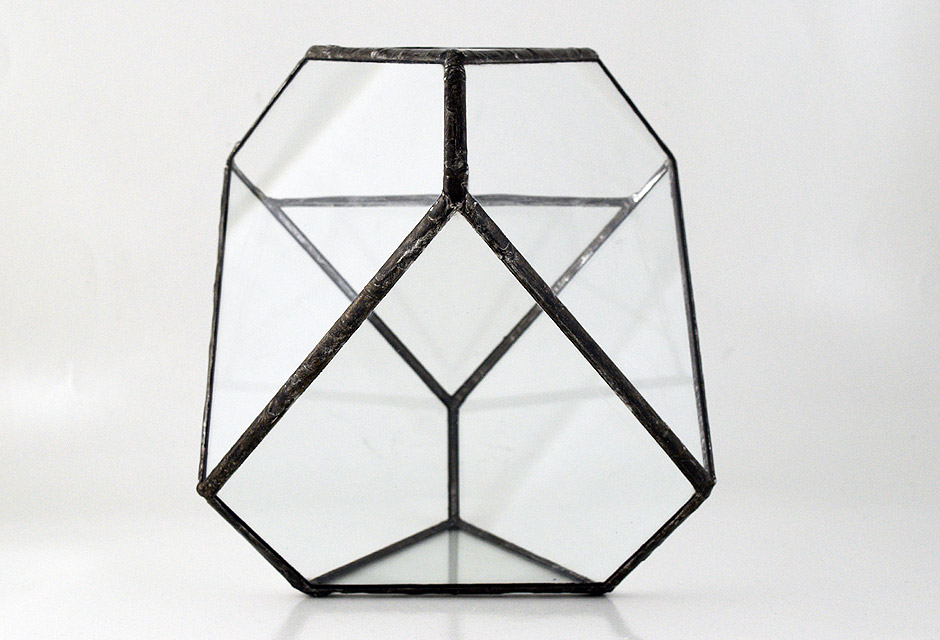
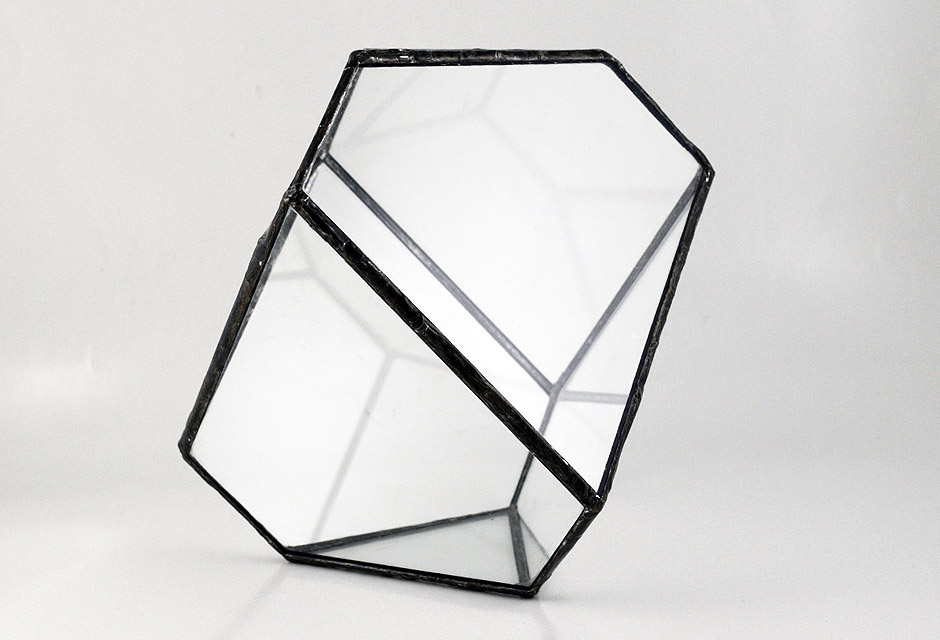
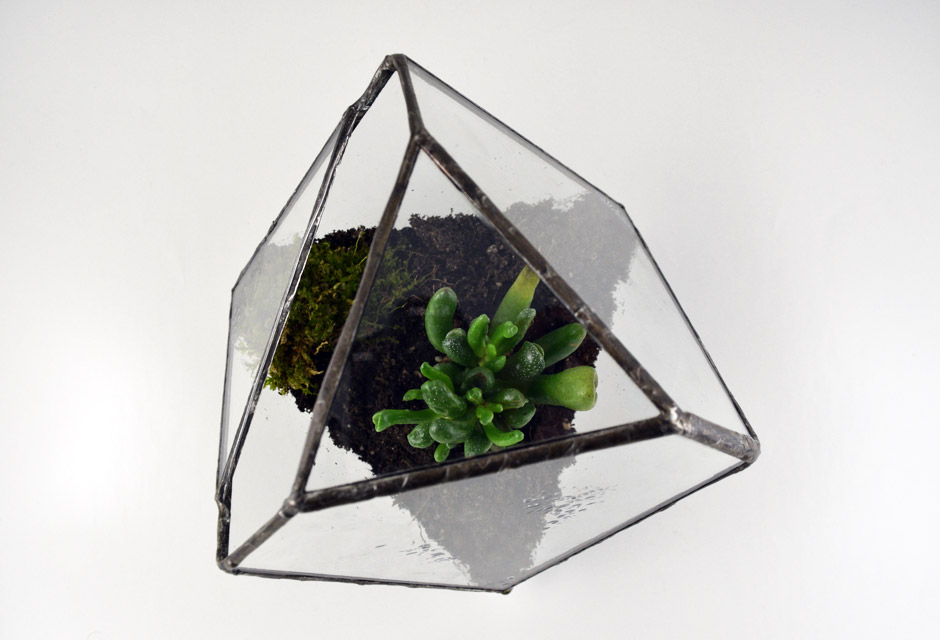
In early 2018 I custom made a 'Durer's Solid' glass terrarium for someone, planted with a little Crassula Ovata 'Gollum' mini succulent. This particular Durer's shape is based on a rhombus angle of 72° so all points of the polygon rest within a common sphere.
To assemble the roughly 8" tall terrarium, six glass polygons and two equilateral triangles were cut and joined together using standard stained glass techniques. Putting it all together was relatively straightforward, fabricating an accurate polygon pattern involved learning some pretty hefty geometric layout methods however.
With Geometric construction rules in hand, a pencil, compass dividers and straight edge I was able to pattern out the two shapes that make up Durer's Solid. The card stock patterns were traced onto glass sheet and the pieces carefully cut out. There's no room for misshapen polygons in Durer's solid, the thin lead-solder joints don't hide crimes.
Here's the deep dive on how this special little terrarium was made.

Geometric Construction Methods
Three basic geometric construction methods were used to make the card stock patterns for this Durer's Solid; (1) bisecting a line perpendicular to the given line (fig 160), (2) drawing a pentagon (fig 176), and (3) drawing an equilateral triangle (fig 174). Here are these three geometrical methods:
Figs. 160, 176, 174 are from "Technical Drawing, fourth edition" by Geisecke, Mitchell, Spencer. 1963, The Macmillan Company.

Fig. 160. Let AB be any given line or arc. From A and B draw equal arcs with radius greater than half the length AB. Join intersections D and E with a straight line to bisect line AB and locate the center C, as shown.

Fig. 176. (I) Draw a circle of any radius, bisect circle through O with straight line. Given the circumscribed circle, bisect radius OD at C. (II) With C as center, set compass to distance CA, with CA as radius, strike arc AE. With A as center, reset compass to distance AE, with AE as radius, strike arc EB. (III) Draw line AB, then set off distances AB around the circumference of the circle, and draw the sides through these points.
Fig 174. Given line of length AB, with A and B as centers and AB as radius, strike arcs to intersect at C. Draw lines AC and BC to complete the triangle.
Geometric Layout of Durer's Solid Polygon Pattern
With knowledge of the geometric constructions methods above, laying out the polygon shape of Durer's solid becomes a series of sequential steps.
For this project, the sides of the equilateral triangle measure 3-13/16" and since all points of the polygon rest within a common sphere, and the top chord must also measure 3-13/16", the polygon is determined to have a radius of 3-7/32".

The three sketches above illustrate the ordered steps necessary to lay out the polygon shape in Durer's Solid, given a 72° rhombus: (1) a pentagon is first layed out to create an accurate 72° angle. (2) two lines at 72° to another are extended and the radius r of the polygon is set. The remaining faces of the polygon are marked off using length of line a and connected. (3) the completed polygon is revealed.
Fig 1. Using an arbitrary radius of 3", draw a circle and lay out a pentagon within this circle using the described geometric method in Fig 176.
Fig 2. Extend two lines from origin O through two adjacent points on the pentagon. This results in an accurate 72° angle, since a 360° circle divided by 5 is 72°.
Set compass to radius r of 3-7/32", strike arc from origin O to intersect each of the 72° angle lines. Bisect the arc using the described geometric method and draw straight line from intersection Q to O. Intersection P is now the center of the polygon. Reset compass to a radius r of 3-7/32" and draw a circle with intersection P as origin.
Extend both 72° lines, if necessary, to intersect with this cricle. Lines O A and O B are both length a. Set compass to length a and from point A mark the opposite side of the circle at point C. Set the compass on point B and mark the opposite side of the circle at point D.
Fig 3. Draw a line from point A to D, D to C, and D to B. This describes Polygon OADCB of Durer's Solid, with all points of the polygon resting within the common circle.
For the equilateral triangle, given line of length 3-13/16", with A and B as end points and AB as radius, strike arcs to intersect at C. Draw lines AC and BC to complete.
The card stock templates were cut out and all glass shapes cut to their likeness.

Cutting the glass
The process of translating card stock patterns into accurately shaped pieces of glass requires practice. An inexpensive carbide wheel glass cutter was used, which is probably not the best tool. Glass tends to be pretty forgiving when cutting out triangular shapes.
It all went down something along these lines:

- Double sided tape was applied to bottom of the card stock pattern to keep it from sliding around on the 3mm thick glass, the shape was traced out with a Sharpie.
- After tracing one shape, a 1/8" thick aluminum straight edge was used to guide the glass cutter. The glass cutters' carbide wheel had to be offset from the straight edge so it lined up with the INSIDE of Sharpie mark. Appling electrical tape to the bottom side of the aluminum helped prevent it from slipping during cuts.
- The glass was scored in one stroke with the glass cutter. Firm and even pressure applied to the cutter while holding it perpendicular to the glass; this takes practice. Don't go over a scored line twice.
- Glass was then snapped at the score line with a decisive motion. For small offcuts, tapping the score line helped before using pliers to break off the waste. With long cuts, supporting the glass over the entire score length and pressing down on the free end seemed to work best.
- After all glass was cut, the razor-sharp glass edges were 'softened' with 80grit carborundum on a belt sander. Took about 1-2 seconds per edge and threw up lots of lovely glass dust.
- Glass pieces were wiped clean to remove grit and sharpie marks.
Glass Terrarium Assembly
The basic idea here is to apply an adhesive backed copper foil around the edges of all pieces of the glass, then use solder to bond the pieces together. The lead-solder bonds to the copper, not glass, but ends up forming a channel which mechanically holds the terrarium together. Large stained glass would typically use 'lead came' (H-shaped lengths of lead) to do this, so the lead and copper foil can be thought of as a small scale analog.
The fabrication process went like this:

- Copper foil was applied to all edges of each piece of glass. For this project, 3M VentureTape black adhesive backed 1/4" copper foil was used. If heat lingered too long, the tape would lift off the glass which caused leaks later on. This was difficult to work around.
- Evenly applying the copper foil was best accomplished by centering the glass in the copper foil while looking straight down, with the foil on a table surface, adhesive side up, then wrapping the copper around all edges and finally overlapping the end by 3/8".
- Next the copper foil was bent over to one side, each corner tucked in neatly and overlapped on next edge to maintain an un-wrinkled appearance. Then the foil was bent down on other side of glass in the same manner.
- To ensure a good bond, the foiled edges were rolled down with a hard rubber roller.
- With all six polygons and both triangles foiled, the assembly began right away. If the copper foil is allowed to oxidize, it makes later steps more difficult.
- To hold the glass faces together as the three-dimensional Durer's Solid is formed up, 'Kapton' polyimide tape was used. This is a yellow looking tape that's temperature resistant to 500°F and leaves no adhesive residue when removed.
- With the shape formed up and held together with Kapton tape, some glass panels were repositioned to ensure even contact along the seams. At this stage, the soldering order needed to be determined, or else it would be impossible to reach some locations on the inside of the terrarium.
- Flux was sparingly applied at the corners and most of the glass panels were 'tack-soldered' in place. The pane of glass opposite the terrarium opening had to be left completely un-soldered until the very end or it wouldn't have been possible to finish-solder the inside joints of the terrarium. Canfield Copper-Mate paste flux (a mix of Ammonium Chloride, Zinc Chloride, Petrolatum) was used.
Soldering the Glass Together
Solder holds the Durer's Solid terrarium together, but the real skill is in applying a thick and aesthetically neat bead to seams going in all different directions without blowing through the bead on the other inside. It's also really important to not solder oneself into a corner where it's impossible to reach certain inside seams with the soldering iron.
In addition to the standard Weller tip, this project required a bodged 30° angle tip made from some twisted 10ga copper wire, stuck into the end of the soldering iron.

- The copper was lightly fluxed and then tined using 60Sn/40Pb solid core lead/tin solder, outside first, then inside. 50/50 solder could also have been used. A Weller SPG80L 80W stained glass soldering iron was used throughout the project, but it burned out and died after maybe 10 uses.
- Next, the inside/outside of each seam was finish soldered. Finish soldering involves laying down a relatively thick, clean bead of solder. The challenge is to keep the seam completely level while it's being worked so the solder doesn't pool at one end. Holding a wet rag on the other side of the seam can also help keep the heat from ruining the other bead face. This is a tricky step and takes practice. A good trick is to exit the seam by sliding off to the side over the glass, as lifting up creates a point in the solder seam.
- Once all sides of the terrarium were finish soldered, inside and out, the last pane of glass was soldered in place and finished through the terrarium opening.
- To mechanically strengthen the terrarium opening - likely to be used as a hand-hold when moving it about - a 16ga brass wire was run around the circumference and soldered into place.
- Excess flux was then wiped from all joints using a rag. A fresh rag dipped in methyl alcohol then cleaned up any remaining flux residue.
- The bright solder joints of the terrarium can be left as is, or chemically treated to give a darker appearance. Darker looks better, so a thimble of JAX 'Brass, Bronze, Copper Darkener' solution was poured off and an acid brush used to coat all exposed solder seams. Each seam was gone over twice, by that time the JAX had reacted and turned the shiny solder dark and dull. The excess chemical was poured out and the terrarium well rinsed with warm water.
- As a final step, the lead-tin solder was sealed by rubbing with a rag coated in paste wax. The wax helps protect the solder and results in a nice looking, shiny, dark joint.

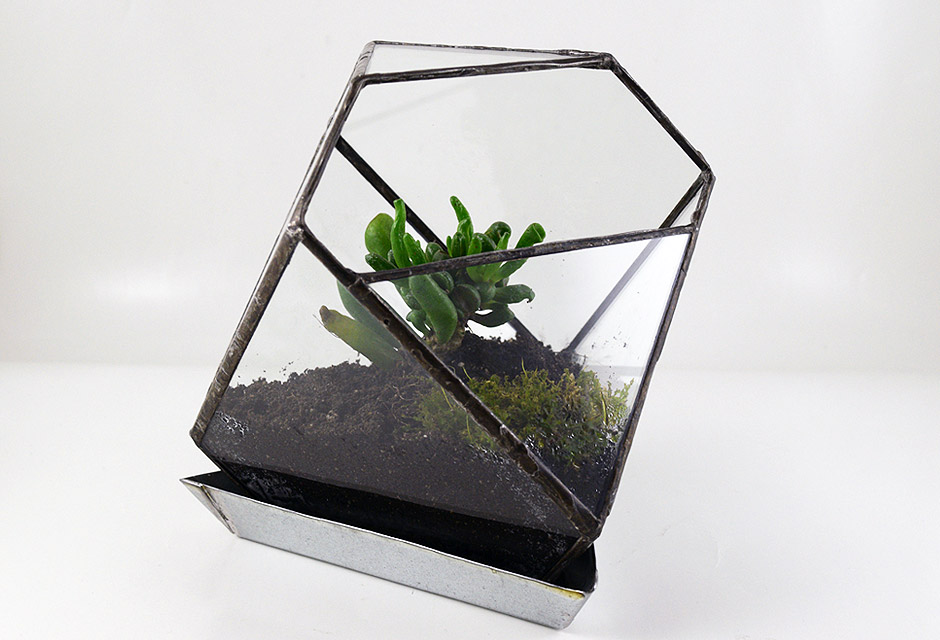
Planting a Succulent in a Terrarium
Drainage is key.
In this Durer's Solid terrarium, a layer of charcoal maybe a 1/2" thick was first laid down, then a small screen to keep the soil from mixing in. On top of this, sterilized soil mixed with a bit of sand was dampened, then scooped in to an appropriate depth and tamped down. A divot was dug out, the Crassula Ovata 'Gollum' mini succulent planted and the soil around it tamped down to keep the plant firmly in place. The soil was then given 10cc of water and the Durer's Solid terrarium placed in a sunny window for a couple days to help the succulent settle in.
Good results have been had by watering maybe once every 10 days. The soil needs to completely dry between waterings.

Folded Metal Drip Tray
Last but not least, a one-piece sheet metal drip tray was bent up to mirror the shape and angles of the bottom of the Durer's Solid terrarium. The three seams were soldered for good measure.
The paper pattern shown below was made using principles talked about in this sheet metal project.

Back to Portfolio...