Folding Sheet Metal
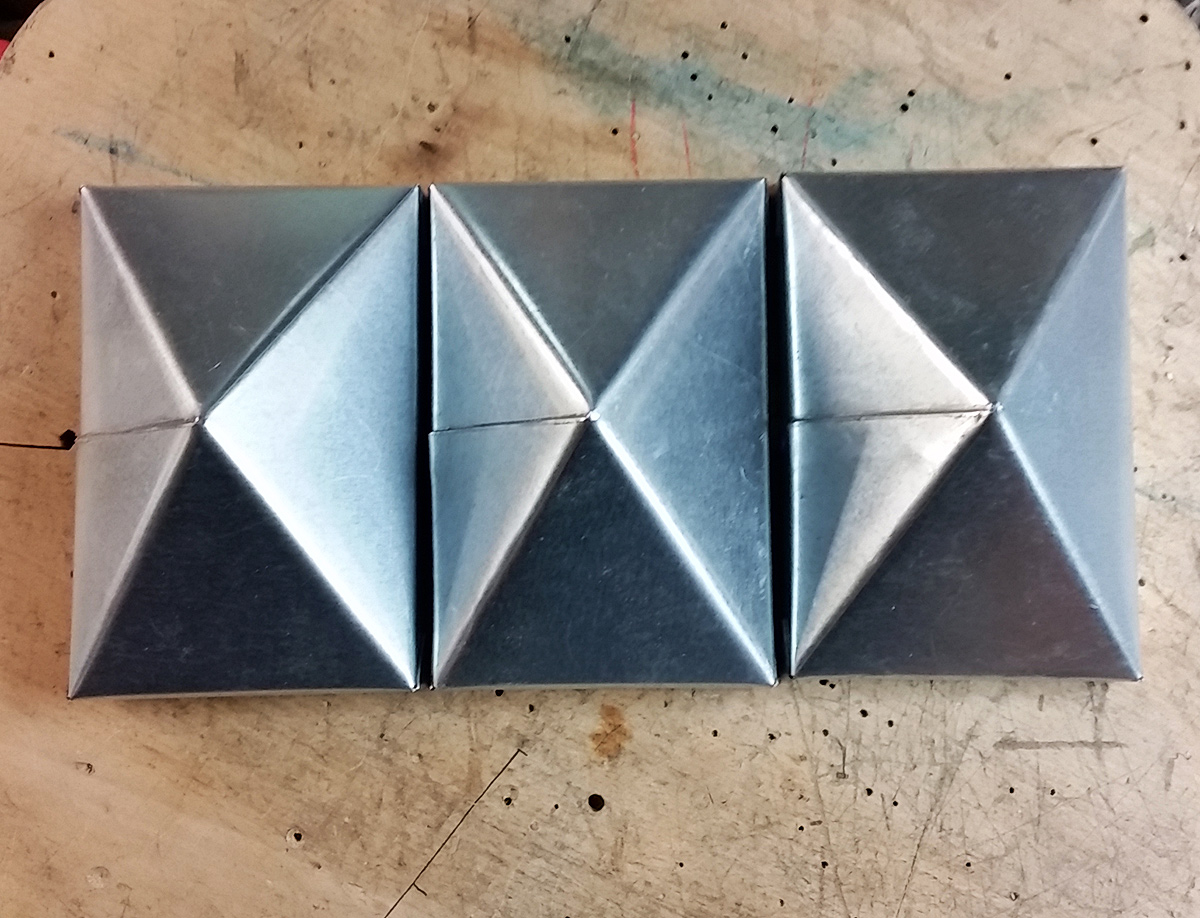
Made from a single sheet of galvanized metal, cut and bent in just the right places, each of these 6x4" Fir post caps are plainly practical objects. What's interesting is not so much what they're for (keeping water from rotting Douglas Fir posts), but rather the process behind how to make them.
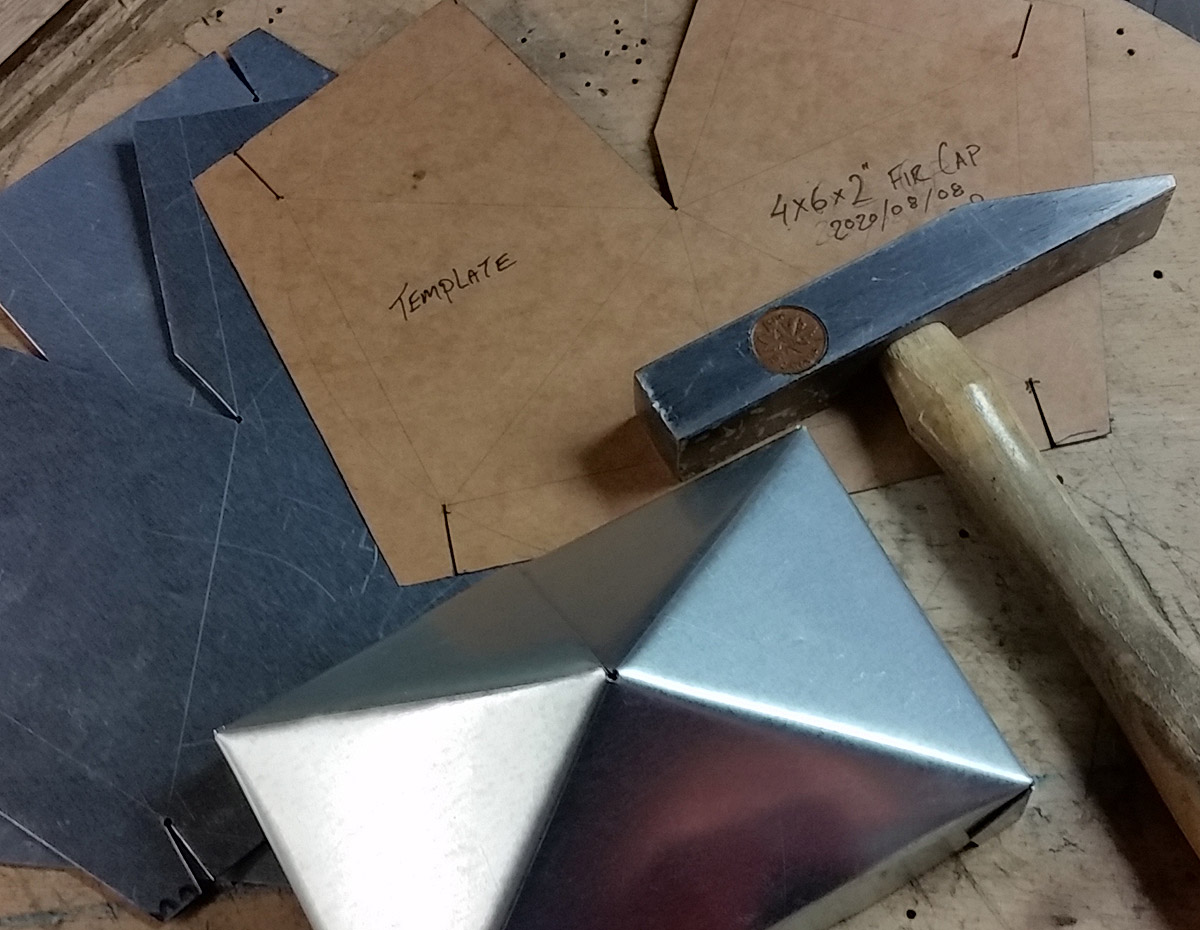
To construct the pattern for this project I used compass dividers, a pencil and a rule. That's it. Geometric layout and a handful of 'geometric truths' - rules for how to draw perfectly perpendicular, parallel and angled lines - were all that's required to devise the plan to transform one flat bit of metal into a remarkably dimensionally accurate shape. It all seems like some mysterious dark art.

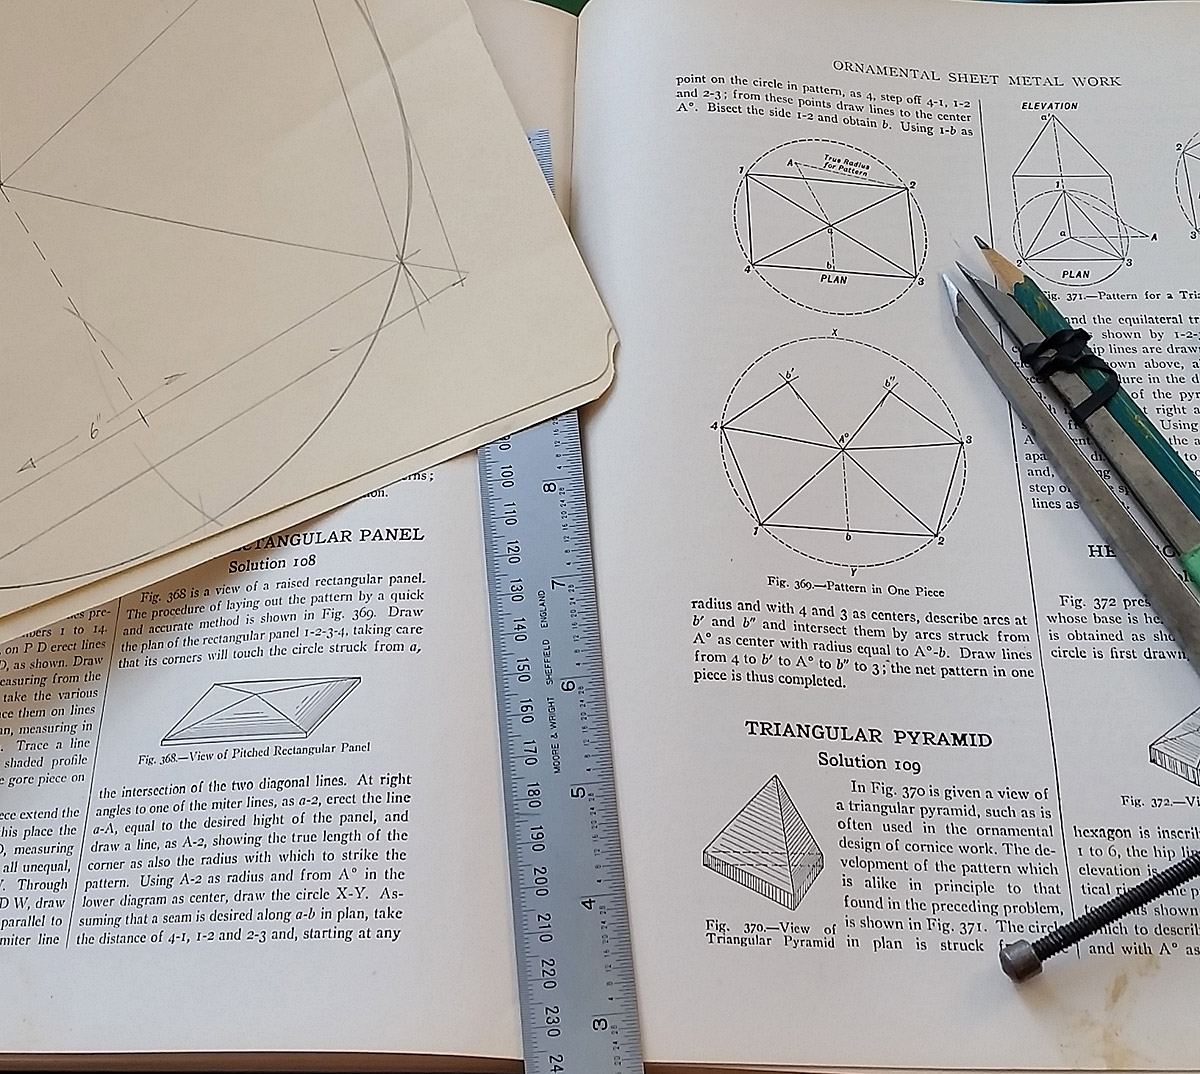
The actual pattern for a 'Pitched Rectangular Cover' comes from pg. 106-7 of William Neubecker's 1941 tome on sheetmetal: The Universal Sheet Metal Pattern Cutter Vol 1. This is a massive two-volume set covering what's practically an obsolete skilled trade now a days.

The three illustrations above and the tersely worded instructions below guide one through the ordered steps of drawing the Plan, Elevation and Pattern at a 1:1 ratio. All that's required is to set the length (6"), width (4") and height (2") the final shape will have. All other values are determined purely geometrically.
The principle employed in developing this pattern may be applied to any shaped figure inscribed in a circle, when lines drawn from the corners of the figure terminate in an apex, directly over the center of their base or circle. Fig. 268 illustrates the principle involved.
Here we strike the circle from the center a and the corners of the figure, or, in this case, the plan of the rectangular cover, meet the circle at 1, 2, 3 and 4, and lines drawn from these corners terminate, directly over the center of the figure or center a, thus making all hip or diagonal lines equal, as shown.
In laying out work of this nature, the elevation may be omitted, for, since we know the vertical height of the cover at its apex, it is but necessary to lay off this height at right angles to one of the hip lines, all of which are alike, and the true radius of the pattern will be the result.
Assuming the height of the cover to be equal to a' A' in elevation, lay off this distance at right angles to a 2 in plan and draw a line from A to 2, which is the true radius for striking the pattern.
Now using A° as center with radius equal to A 2 describe the partial circle 3, Y, 4. Assuming that a seam is required along a b in plan, take the distance 1-2 in plan and set it off on the circle in the pattern from I to 2. Take the width of the narrow side 1-4 or 2-3 in plan, and set it off in the pattern from i to 4 and 2 to 3. Bisect 1-2 in the pattern and obtain b.
Using A° as center and A° b as radius, describe the arcs b' and b" which intersect by arcs struck from 3 and 4 as centers, with either 1 b or 2 b in the pattern as radius. Connect lines in the pattern as shown. Then b", 3, 2, I, 4, b' will be the net pattern sought. Allow edges for seaming. These principles lend themselves also to covers of square or other formation.
Once the pattern is layed out on paper, extra material is "added" where overlapping seams or drip edges will go. One paper template was made to test the design and iron out kinks, before laying the final pattern out on cardstock.

The end result is flat Pattern for making a volumetric shape. Since multiple Fir Post Caps were to be made, time was saved by tracing the one pattern out onto the sheet metal multiple times and lightly scribing in the inner lines.

From there the basic process was:
- Cut pattern out from metal sheet stock with offset Weiss aviation snips; these handle thicker gauge metal more easily and with lower hand fatigue.
- Use a vise and short length of angle iron to bend the metal along scribed lines. A soft faced dead blow hammer and block of hard wood facilitated clean, flat bends.
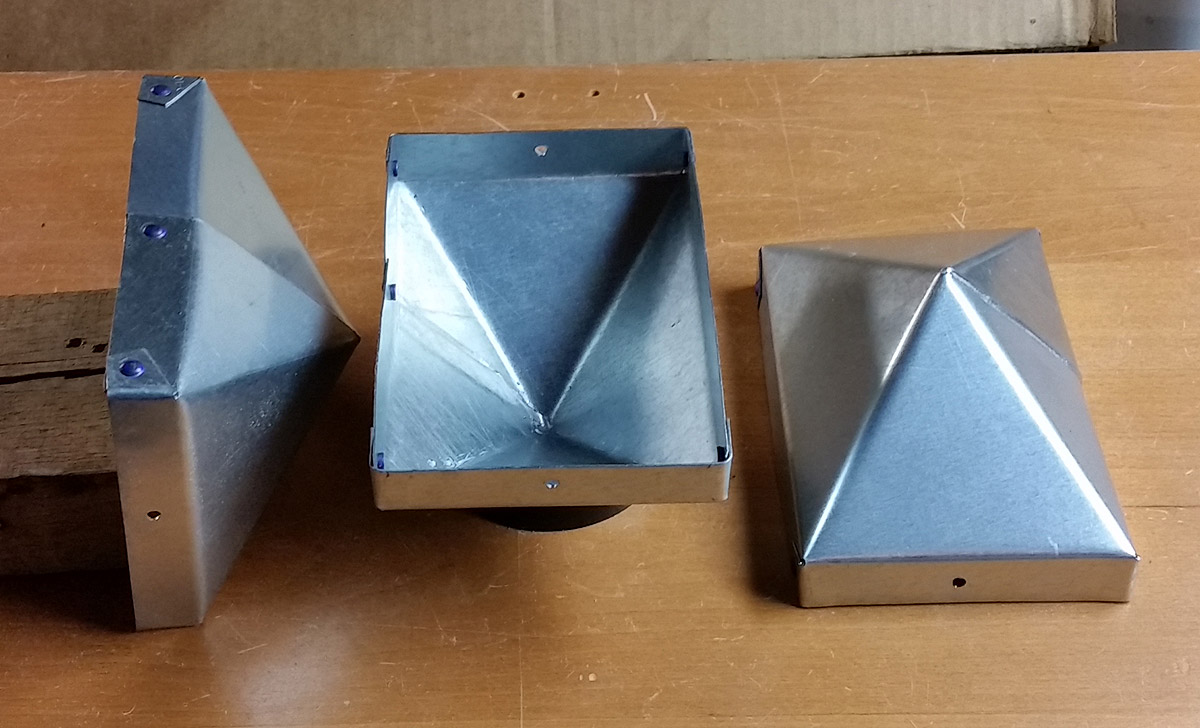
- Once bent into shape, the four corner tabs along the drip edge were drilled and rivetted.
- As the single top-to-side seam allows water in, this was sealed up with 60/40 PbSn solder. The novel development was to use 2mil Kapton tape (Pro-950 Polyimide rated to 500°F) to mask the metal on either side of the joint and thus keep the actual solder neat and tight.
- With kapton tape in place, 'brighten' the galvanized sheet metal in between using a 3M scratch pad, repeat along the inner length of the joint.
- Flux both sides, with an 80w weller stained glass soldering iron, form a clean joint.
- Remove kapton tape and clean up excess flux with alcohol.

Final result is several 6x4" sheetmetal Fir post caps. The cap works to shield the end grain of Douglas Fir from water and the environment, extending the life of the wood many years.

Back to Portfolio...