

Things that fall off the table...
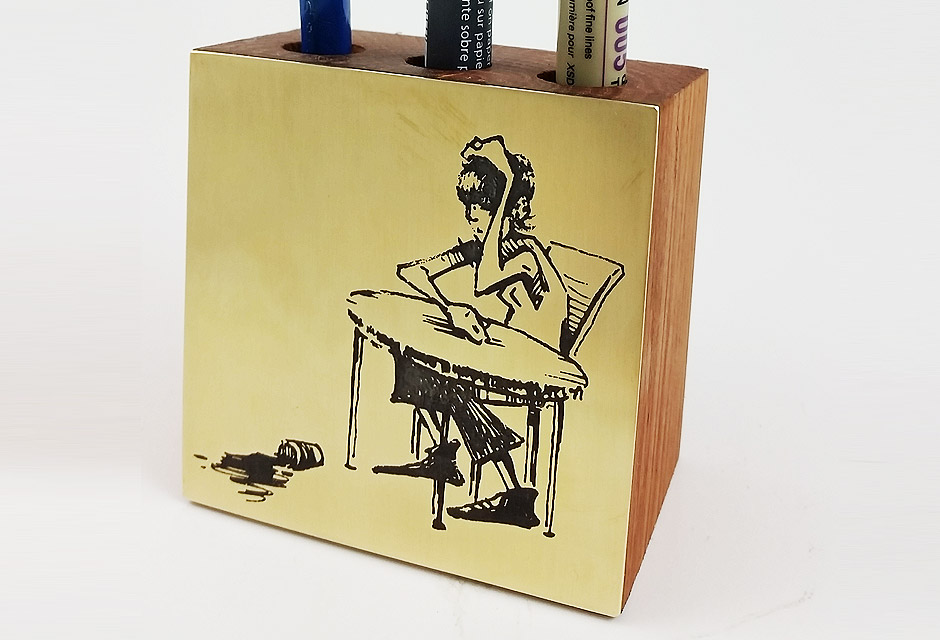
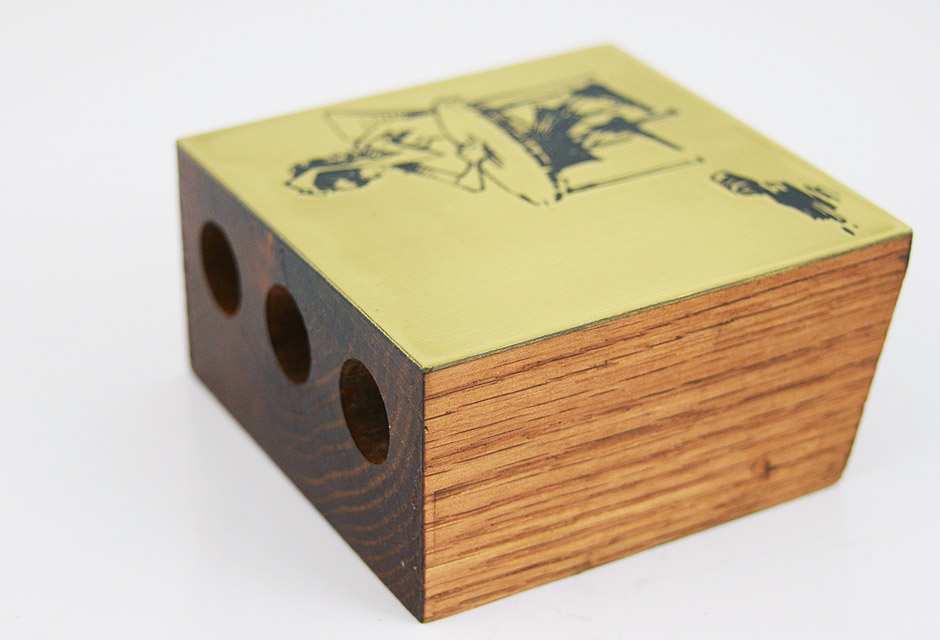
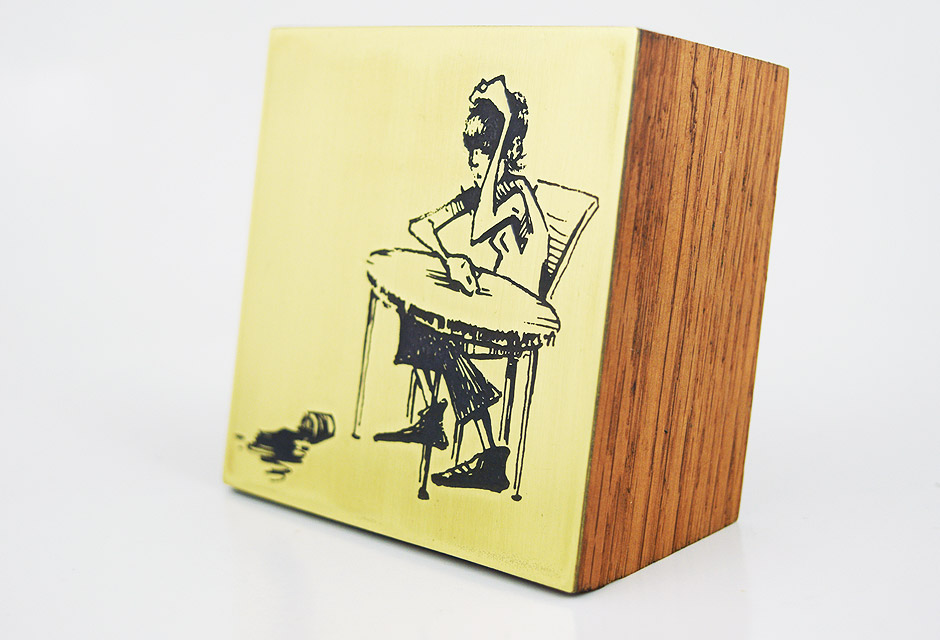
This is a dedicated sketching pen/pencil stand with a small character sketch etched into the surface of brass. The motivation to make this was pretty simple; I got tired of pens rolling off the table and onto the floor. Kind of like the little characters' knocked-over cup of coffee.
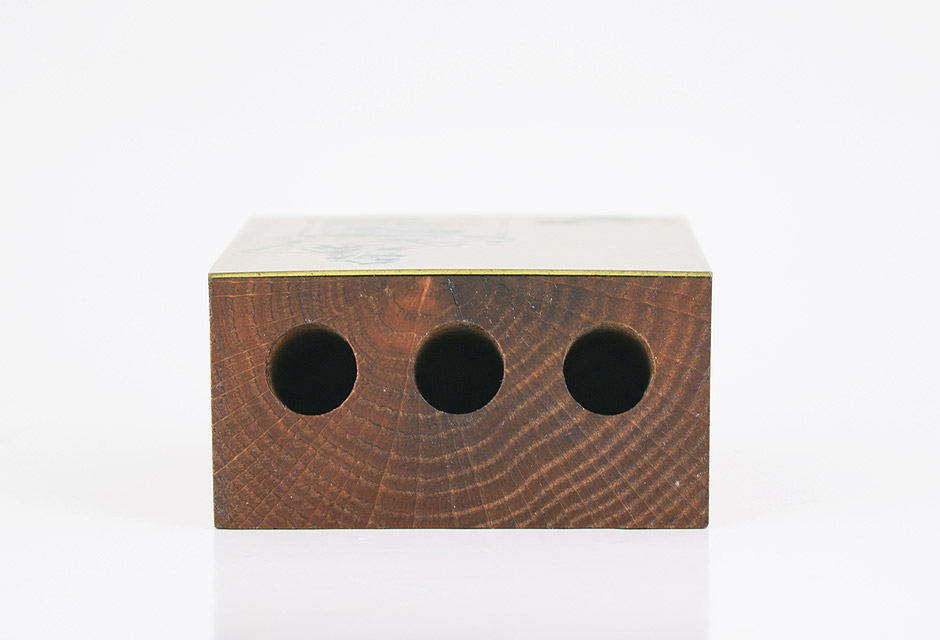
The stand has a couple holes spaced widely apart to fit the pencils I typically sketch with. The wood is cut with a small back-tilt to make it less prone to tipping and the sloped top naturally provides a register to the vertical holes, guiding pens in without too much effort. The bottom angle is cut just shy of the front face, elevating that edge slightly.
The Sketch
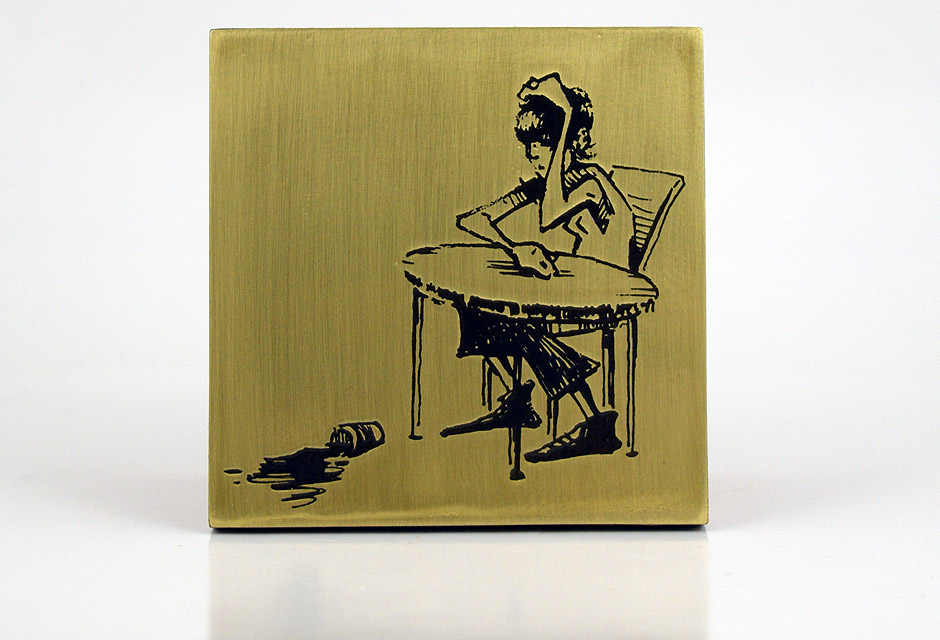
The brass plate has an original Copic pen drawing by artist Katie Sawatsky, a visual development illustrator who works in the videogame industry. The sketch is titled "Tiny me has got this day ON LOCK" and is from May 19, 2016. The evocative little drawing is chemically etched below the surface of the brass, adding to its character.

The process of translating ink and paper into an artwork mask suitable for use with photopolymer film, went something along these lines;
- The digitized artwork is tweaked to boost contrast levels without sacrificing drawing detail. Transparency film doesn't handle greys particularly well, so illustrations need to be more or less two-colour (black and white) for the best results. The photopolymer used in this process relies on a positive image mask; black areas will be etched and white areas are the mask.
- Image resolution is increased to 600dpi and the graphic sized to the physical print dimension of 70 x 70mm.
- The image is *flipped horizontally* in software so when it's printed the toner side of the transparency rests against the photopolymer film. Not doing this leaves a small gap (the thickness of the transparency sheet) which leads to a loss in fine detail, depending on whether a natural or artificial UV light source is used.
- An 8.5x11" collage of several image variations (ie. different sizes, compositions, etc.) is put together in software along with test strips and printed in one go. Individual masks are cut from the transparency sheet as needed.
- Laser printer settings are adjusted to paper type = transparency which increases heat dwell time in the printers' fuser, else uncured toner can wipe off the heavy transparency stock.
- For this project an HP LaserJet M527f was sourced and laser printer grade transparency sheets utilized (ie, won't melt in the fuser). Part was Staples SKU: 23240.
Exposure Time
Once the artwork mask was completed, several test strips were run through to determine the correct exposure time for the transparency mask + laser printer + UV light source combination.
To do this, small sections of a long test strip were exposed a few seconds before a light block slid up and another portion of the strip exposed. This way, exposure time builds up along the length of the test strip in increments of say 10 seconds. Once the photopolymer is developed it's easy to figure out the ideal exposure time.

Underexposed photopolymer washes off the metal completely or will come out of the developer as dull and pitted. Overexposed photopolymer tends to obliterate finer mask details, like maxing out the contrast on an image. Correctly exposed photopolymer will be hard and shiny once it dries, with crisp edges and fine detail showing. The material used in this project is capable of 20 - 25 micron resolution. Exposure time worked out to be 1m45s at 6pm in direct sunlight for the final etching.
Metal Prep
A brass sheet slightly larger than the finished 70x70mm size was cut from 0.025" / 0.6mm shim stock using a fine-tooth spiral fret saw blade. Sawing doesn't introduce distortions or bends that aviation snips or hand shears can. If the metal is thin enough, jewellers' shears work well though. Whatever the cutting method, it's critical the metal remains flat.

Surface prep is essential for a good photopolymer film bond, the basic process is;
- File off rough edges and check metal for flatness. If there's a significant curve, as with shim stock from a roll, anneal the brass and gently beat flat between two hardwood boards.
- Clean off any dirt/oil with alcohol and use 600grit random orbital sander to remove surface scratches.
- Give the surface a bit of "tooth" by abrading with in one direction with a white super ultra fine (7445) 3M Scotch-Brite pad. There's a risk of film delaminates from shiny metal surfaces.
- Rinse with hot water to remove all metal debris and dry with a lint free wipe to prevent formation of water spots.
- Store brass between paper until ready to laminate with photopolymer film.
Photopolymer Film Lamination
Photopolymer is a light sensitive material that comes in a roll about a yard wide. It's stored in blackout bag and has be handled in the dark or under a safe 'yellow' light. The material used in this project is Mungolux F4000 Photopolymer film, which appears similar to Dupont Riston. Riston is UV sensitive between 350-430nm and based on Dupont Technical Bulletin TB-0169, a reasonably safe 'yellow' light can be fabricated from an LED light wrapped with 2mil Kapton Polyimide tape.
Laminating photopolymer film to the brass is done in the dark under safe yellow light. The process relies on a film of water to help lay down the photopolymer without entrapping air bubbles. Here's the basic process;
- In a dark space with no outside light sources, working under safe yellow light (ie. Kapton over LED light) remove photopolymer roll from blackout bag and cut material slightly larger than what's needed.
- Clean brass with distilled water and wipe with a lint-free cloth to remove any debris.
- On hard surface spray brass with distilled water, leave a heavy misting of water standing.
- With photopolymer curve-side up, remove inner protective film with sharp tweezers. Spray with distilled water as the inner layer is removed to kill the static and prevent film from curling in on itself.
- Holding photopolymer film by corners, gently lower onto the brass, starting along one edge and lowering evenly so no air bubbles are trapped under the film.
- With the photopolymer film resting on a bubble of water, the excess liquid must now be removed. A squeegee often distorts the film and causes mask defects. Instead, use a soft teflon/silicon foam rubber roller from a scrapped laser printer fuser to roll out the excess liquid. Start at the center of the metal plate and gently but firmly roll from the center out to the bottom edge to push out excess liquid. Repeat the process, rolling up, then left, right and on diagonals so no liquid is trapped between the film and metal plate.
- Wipe away any remaining water. Place the photopolymer film and brass sandwich on a slightly larger sheet of paper and sandwich between a card stock envelope, this will serve as the laminator carrier. A file-folder works well if the creased section at the bottom fold is avoided (creases will imprint the photopolymer).
- Turn on the laminator, set to high heat (150C) and low speed.
- Place the film-brass-scrap paper-cardstock sandwich into the laminator and run through twice, in the same direction each time. The heat and pressure firmly bonds the film to the metal surface. Excess photopolymer film at the edges of the brass will stick to the scrap paper below, so cut the waste away to leave just the final film-brass sandwich.
- Place the film-brass sandwich in a light-proof container and let it rest for 30min, this allows residual moisture to dry.
Exposure Frame
The mask artwork needs to be pressed tightly against the photopolymer film-brass sandwich and held in position without moving at all, while the film is exposed to a UV light source. A quick exposure frame can be cobbled together from two sheets of thin glass, some dog-clips and a thin sheet of antistatic foam.

- In a dark space with no outside light sources, working under safe yellow light, remove the film-brass sandwich from its light-proof container.
- Place the antistatic foam on top of one sheet of glass. Place the brass at the center of the foam and tape the mask artwork to the film-brass sandwich (or foam), which ever works best. The artwork mask needs to be placed toner-size down and carefully kept centered on the film-brass sheet as the top layer of glass is laid down.
- Use one dog-clip at each side of the glass sandwich to apply clamping pressure, clamping opposite sides sequentially. The foam will compress as the clips are applied and distribute the clamping force so the mask film is held evenly and firmly against the photopolymer film-brass plate.
- Place a sheet of black EVA foam over the top of the exposure frame and put the entire assembly into a light proof bag.
UV Exposure and Developing
In direct sunlight or under artificial UV light source, remove the exposure frame from light proof bag and expose the photopolymer film for the required amount of time (as determined with the test stips). The film will change from a light blue colour to a darker blue and the masked off areas will be visible.

When times up, place the exposure frame back into the light proof bag.
Once exposed, the photopolymer can be left in a light proof container until it's convenient to develop it. At that time, prepare a developer solution of 1% Sodium Carbonate (ie. 10g Na2CO3 'washing soda' per 1000ml water). The developing process goes something like this:
- In a dark space with no outside light sources, working under safe yellow light, pull the exposure frame from its light-proof container and deconstruct it. Take the photopolymer-brass plate in hand and using fine tweezers, peel off the top protective film to expose the photopolymer film to the environment. Immediately submerge the plate into the developer solution and rock gently for about 3 minutes.
- Normal lighting can be turned on at this point.
- After the brass has sat in the developer for about 3 minutes. Rinse in cold water for 30 seconds, then dry with forced air immediately to prevent water spots from forming (interferes with etching process).
- Place developed photopolymer-brass plate under a UV light source (ie. fluorescent light) to fully cure and dry a further 1 hour. Film will change from light blue to dark blue-purple colour. Held up the the light, the film will be glossy and show a sharp relief at the mask edges.

Chemical Etching and Stripping
With the mask completed, the brass plate is etched with Ferric Chloride (same solution used for PCB etching). There's not too much to this, but the devil is in the details and I'm sure there is plenty of room to improve my process. In this instance, a cold etch process was used. Heating the Ferric Chloride will decrease time and apparently improve relief sharpness.
- Any exposed areas of the brass plate need to be taped off to prevent contact with the Ferric Chloride etchant. Apply packing tape to the rear of the plate and cover the sides to protect the edges of the metal. Tape off any defects or pinholes in the mask.
- Depending on the amount of unmasked off area to etch, the cold etch process will take about 1h45m. Place the taped up brass plate into the Ferric Chloride, right side up. If etched upside down, brass tends to get streaky where etched. Agitation isn't necessary.
- Brush occassionally with an acid brush to remove any accumulated debris around the etched areas.


- After 1h45mn the brass was removed from the Ferric Chloride etchant and rinsed under running water for 2 minutes. The packing tape was removed from all surfaces at the same time.
- Prepare a Stripper solution of 10% Sodium Carbonate (ie. 100g Na2CO3 'washing soda' per 1000ml water) and submerge the brass plate. It will take about 30 min to dissolve the bond between the photopolymer film and metal, allowing the mask to float free. If film is still bonded, let it soak longer and scrub with a non-abrasive kitchen scratch pad.

Chemical Blackening The Etch
To provide visual contrast, the etched portions of the brass plate are darkened using JAX 'Brass, Bronze, Copper Darkener' solution. With the brass plate dried from the previous washing steps, pour off a small amount of the JAX solution into a disposable container (excess cannot be poured back into the container once contaminated) and using an acid brush, apply a solid puddle to cover all etched surfaces. Let the solution sit until colour change has stopped. Rinse for 1 minute.

The freshly etched portions of the brass are now black, the rest of the plate is cleaned up using 800grit wet sandpaper and the flat side of a large cork. The cork provides even pressure which is flat and non-scratching.
A small amount of water keeps the sandpaper from loading, rub in one direction until all traces of the blackening solution on the top of the brass is removed. Rinse and dry the brass, then using a dry strip of 1200grit sandpaper, rub in one direction and allow the sandpaper to load up, this will give the brass a finer surface finish approaching a polish. Wash and dry to remove any debris.


Bonding the Brass Plate
In the last stage of this little pen stand, the brass was scribed to size and cut with a fine-tooth spiral fret saw. To help the brass adhere to the epoxy, a pattern of small barbs are pricked onto the back of the plate with a graver.
The brass plate and wood block were then married together using epoxy and allowed to dry for a full day before the excess metal and adhesive were removed with a smooth cut Oberg file. Filing away from the wood helps keep brass from embedding in the relatively porous Red Oak.


The Wood Block
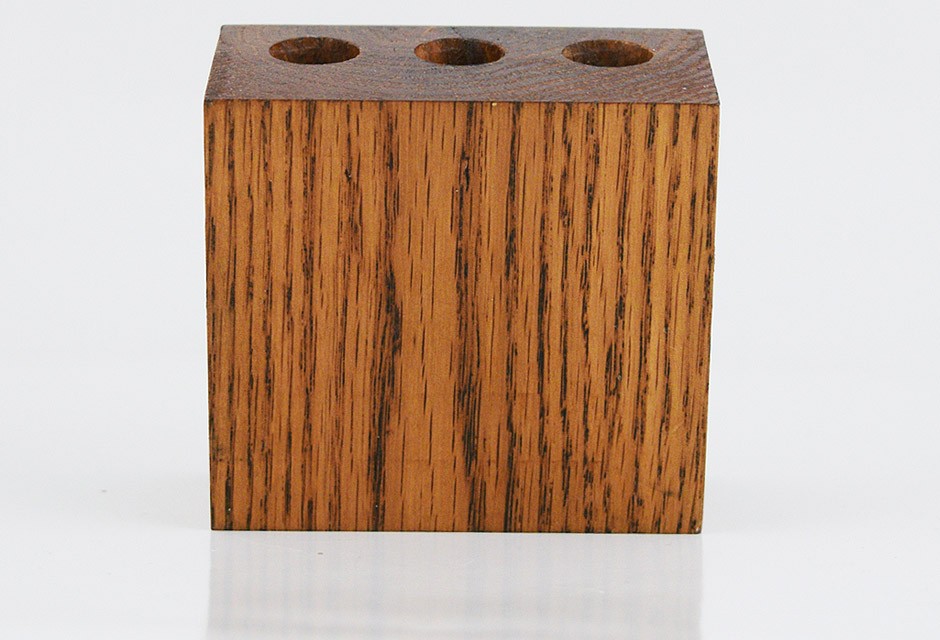
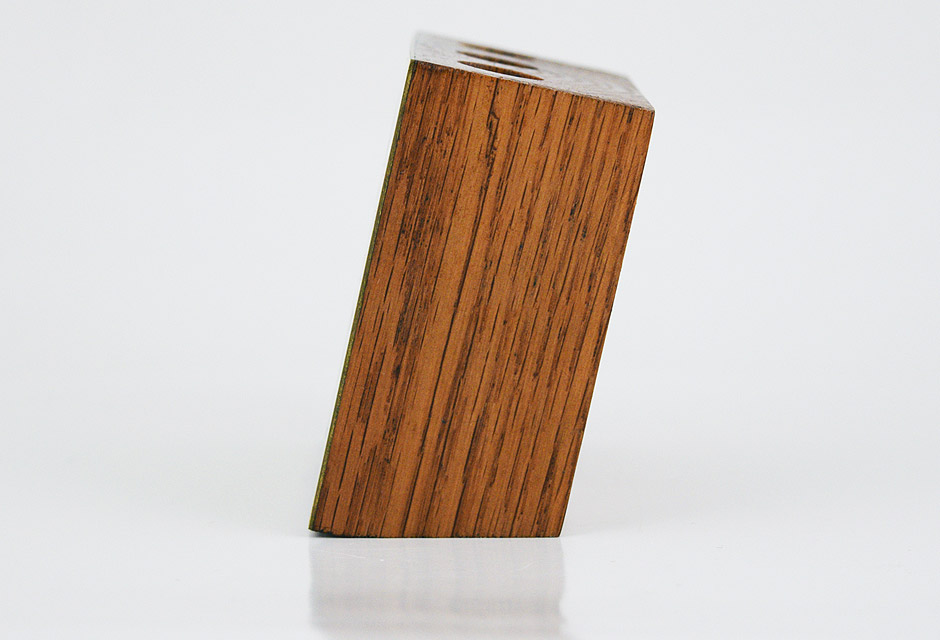
The wood block is cut from reclaimed Red Oak and measures 70x70x36mm in size. There is a 12-degree bevel cut on the bottom face, stepped back 1/4" from the front edge. Three 1/2" diameter holes are drilled 50mm deep into the top face, equidistantly spaced apart, at an angle relative to the rear surface so the holes are plumb.
On the front face where the etched brass plate is affixed, a 1/16" deep recess is cut into the wood about a 1/2" in from the edges all the way around, to give a bit of room for epoxy adhesive and brass barbs to key into. This permits the brass sheet to sit flush against the wood along all four edges, while leaving enough adhesive behind the metal to bond it firmly.
The wood was squared up with standard wood working tools. A minimal amount of finish sanding was done to remove tooling marks and preserve the sharp corners. A light rubbing of Danish Teak Oil was used to finish the Red Oak as a final step, allowed to dry and then everything sealed up against liquid spills with a 2K Polyurethane clear coat.

Back to Portfolio...